Simple Ways To Remodel Your Hardwood Flooring

How do you care for solid hardwood floors?

Solid Wood Flooring offers a unique combination of class, durability and character to its surroundings – making it one of the best flooring choices for a homeowner looking for a new floor. However, these dashing good looks and amazing characteristics of  hardwood floors need protecting from daily wear and tear and other environmental circumstances and require a little attention. The general rule of thumb for any solid wood flooring is: pay your flooring care and attention and your floor will reward you with years of stunning style and service.

When maintaining solid wood flooring, keep your solid wood flooring clean using a vacuum and a brush to remove dirt and debris. Ensure your hardwood floor is dry as water presence can facilitate buckling and and warping of the boards. A slightly damp mop when mopping is recommended, but keep mopping to a minimum. Protecting your flooring from furniture is easier when using felt adhesive pads to create a cushion between your furniture and your floor. Considering pets, ensure nails are trimmed to prevent claw scratches. Finally, excessive sunlight can cause fading and discolouration, using curtains, blinds or UV coating on windows can protect your flooring from direct sunlight.

Keep your Solid Wood Flooring Clean

The most frequent threat to your flooring is general dirt and dust that can scratch and damage the surface. Thankfully, the solution to this problem is regular care with a vacuum and a brush. This gently removes the dirt to remove any debris.

Keep your Hardwood Floor Dry

Another regular threat to hardwood floors is water. If left to soak in, water can warp the boards and lead to buckling; therefore any spills require quick cleaning.

It is worth noting that you should only use a slightly damp mop when mopping the floor – but also to keep mopping to a minimum. As an alternate method of cleaning, a soft bristled broom will also help keep your hardwood floor free of dirt.


Avoid Excessive Sunlight

Homeowners should beware the potential havoc that sunlight can wreak upon floors that are made of hardwood. Excessive sunlight can cause fading and discolouration, so care should be taken to make sure that no area of the wood floor receives too much direct sunlight.

Curtains and blinds are perhaps the most inexpensive way to minimize sun damage, but UV coating for the windows is another possibility when it comes to protecting your floors from harsh sunlight.

A mat can also help cover part of the floor that is heavily exposed. Also, if you do get an area of exposed wood fading, moving the mat around to ensure similar levels of sun elsewhere can help even out the colour, although the result will be a paler floor.

Stains on Hardwood

Hardwood can be stained by materials such as ink and wine. While dried stains may need sanding, a fresh spillage can be dealt with by quick cleaning. However, it is important that you do not clean a stain using too much water, as this can lead to the wood soaking up a lot of water and swelling. For the same reason, avoid allowing standing water to stay in place on the wood. Always mop it up quickly.


Taking Care of Problems

Your hardwood floors will get scratches in the protective finish, and that is to be expected. Most won’t be visible. Putting on a new top coat after 3-4 years can rejuvenate the luster of the floor.

For deeper scratches that are visible, you’ve got several options:

  • Use a cotton swab to apply stain to the scratch.
  • Use a scratch kit from the wood manufacturer.
  • Use a magic marker of similar color for very small scratches.
  • Use a wax stick of the same color as the stain.
  • If your floor is not prefinished, you may be able to sand out scratches and reapply the finish.


Top tips for maintaining and cleaning wooden floors

  • Wipe away water spills immediately.
  • Remove footwear before walking on your floor.
  • Use felt protector pads and never drag heavy objects across the floor.
  • Sweep away dust and dirt on a daily basis.
  • Clean your floor using a microfibre mop and wooden floor cleaning spray.
  • Never use a steam mop, wet mop, furniture polish or abrasive products.


Methods To Clean and Maintain Your Floors

  • Choose a soft-bristled broom angled. Take preemptive action to get into corners and wide enough to swiftly do the job—moving with the grain, of course.
  • Vacuum with a soft floor nozzle; carpet beaters and brush rolls can damage the finish. Robot vacs do the work for you; shop for one that won’t vacuum itself into a corner and will last at least an hour before stopping to recharge.
  • Attack sticky debris ASAP with a damp clean cloth, a mini squirt of wood floor cleaner, and a vigorous rub; if you don’t like to crouch, plant one foot on a rag. Lift off dust and pet hair with a microfiber mop head, ideally treated with a positive electric charge so it can capture negative-ion ephemera. Keep the mop head moving, again with the grain.
  • Use a damp-mop with a flat-head mop and microfiber pad or a microfiber string mop that has been thoroughly wrung out when it looks dingy. Move with the grain, and control the amount of cleaning solution by using a spray bottle, aiming for a heavy mist or gentle squirt of about a half teaspoon per 2 square feet. No need to rinse. No need to buff either, but cloth diapers and soft socks do work well here.
Continue Reading

Why To Select Reliable Camera Operator

What is a Camera Operator or Cameraman?

A camera operator, also called a cameraman or a camerawoman, is a professional operator of a film or video camera. In filmmaking, the leading camera operator is usually called a cinematographer, while a camera operator in a video production may be known as a television camera operator, video camera operator, or videographer, depending on the context and technology involved, usually operating a professional video camera.

The camera operator is responsible for physically operating the camera and maintaining composition and camera angles throughout a given scene or shot. In narrative filmmaking, the camera operator will collaborate with the director, director of photography, actors and crew to make technical and creative decisions. In this setting, a camera operator is part of a film crew consisting of the director of photography and one or more camera assistants. In documentary filmmaking and news, the camera is often called on to film unfolding, unscripted events. In 2006, there were approximately 27,000 television, video, and motion picture camera operators employed in the United States.

Important camera operator skills include choreographing and framing shots, knowledge of and the ability to select appropriate camera lenses, and other equipment (dollies, camera cranes, etc.) to portray dramatic scenes. The principles of dramatic story telling and film editing fundamentals are important skills as well. The camera operator is required to communicate clearly and concisely on sets where time and film budget constraints are ever present.


The Responsibilities of a Camera Operator

PRE-PRODUCTION

  • Read and digest the script.
  • Discuss with the Director and Cinematographer/Director of Photography (DoP), all aspects of the script.
  • Discuss style of shooting.
  • Recce all locations.
  • Review all set plans.
  • Determine technical details such as – where tracks are to be laid, size of crane or dolly.
  • Determine type of heads – remote, fluid, geared or hand-held and tripods.
  • Or Steadicam (usually by a specialist operator).

SHOOTING

  • somewhere between these two examples.
  • Once the way a sequence to be filmed has been decided in the way of rehearsals, the Operator will be involved with the Director and DoP on the choice of lenses and the way the camera may move.
  • The Operator will then supervise the 1st and 2nd AC’s and the Grips to set up the shots while lighting and rehearsal of actors are in progress.
  • The Operator will check with the Script Supervisor that directions and eye lines (lefts and rights) are correct – although for an Operator that should be instinctive.
  • Liaise with the 1st AD of the extent of the shot so that extras and background action can be set, and not wasted in non-photographed areas.
  • Check for any irregularities with make-up, hair and costume that may not have been spotted by their departments.
  • Work with the art and props departments with the setting of any dressing on the set, either in the foreground or background.

ROUND-UP

  • As the Operator is the member of the crew who looks through and operates the camera he or she must be fully conversant with any type of head.
  • Also he or she should ideally have been a 2nd AC (Clapper Loader) and 1st AC (Focus Puller) prior to becoming an Operator so that the skills and difficulties in these grades can be appreciated.
  • It is essential to know all crew members’ names. Standbys (carpenters, painters, riggers, plasterers and stage hands), Grips, Art department personnel, Props and Electricians are constantly working at the behest of the camera department.
  • Occasionally the Actors – as well as the Director or DoP will ask the Operator for his or her opinion on some matter concerning a shot, at this time a certain amount of tact may be required.
  • The essence of film-making is team work and the Camera Operator is right in the middle of it all, so he should be a good communicator.
  • All departments ask the Operator questions and the answers should be forthcoming, or at least, fielded to the person who is better qualified to answer.
  • The expertise and hard work of every department is eventually telescoped into those images produced by the motion picture camera which is why the Operator is such a key member of the crew.


Camera operator skills

Certain skills are essential if you want camera operator jobs.

Here are the important traits you must master.

  • Have good working knowledge of all camera systems, lenss, support equipment and accessories.
  • Have a good sense of visual composition, perspective, and movement.
  • Pay close attention to detail.
  • Be able to collaborate and work as part of a team.
  • Be diplomatic and sensitive when working with artists and other crew members.
  • Be informed about health and safety set procedures.
  • Be able to multi-task. To watch, listen and think on your feet while carrying out intricate technical tasks.


Tips To Improve Your Camera Skills And Get Better Jobs

1) Think of each day’s filming as an opportunity to come back tomorrow.

It may not actually be tomorrow, and it may not even be for the same Director or company, but many people on that shoot could have the ability to employ you at a future date.  If you impress them with your work, they may hire you on a project that has better production values than the one you are on.

2) Be consistent.

Many shooting APs and ADs and even full time Camera Operators turn in footage that is badly shot: constantly crossing the line, out of focus images, incorrect colour balance, poor exposure, the list goes on.  If you don’t believe me, speak to any editor.

All of this creates extra work in the edit, and it also often viewed by those at the top.  It is very easy for a Series Producer to stop by an edit and see poorly shot material.  Of course whoever shot it will have their excuses “I was really rushed”, “we only had 10 minutes to light the interview”  etc etc.

However, the big problem is, these excuses will never be heard in the edit suite,  all they can see is the poor images.  To remedy this, get to know your camera and shooting kit inside out.  Your brain should be taken up with the artistic and creative demands of the project, not the menu system of the camera.

3) Don’t rush, and don’t allow others to rush you.

Be quick when you need to be, but work at a pace at which you can still produce a good image.  Inexperienced Directors and Producers often get a bit panicky with time, especially when working with celebrities or difficult presenters and contributors.

You can work quickly and efficiently, but be firm, don’t rush things through at such a pace where the results suffer.  Remember, the production is paying you to be there to produce good looking, solid images.

4) Always try to inject a bit of gold.

Often the bulk of a project can be a bit flat visually.  You might be shooting a documentary full of talking heads, or a corporate film about rubbish dumps. However, there is almost always room for a little gold or a moment of beauty.

Maybe there is a sequence of your interviewee playing tennis at his local club, or the rubbish dump manager walking across a giant landfill site as the sun sets.


How To Become A Better Camera Operator.

Modern post production workflows can be very powerful with the ability to perform many corrections and adjustments, but very often these adjustments only work well when the footage was shot specifically for those kinds of adjustments. Just because you can adjust one type of shot in a particular way, it doesn’t mean that you can do that to any type of shot.  You should shoot in a way that is sympathetic to the post production process that has been chosen for the project.

The other thing that learning to edit brings is an understanding of how a program or film flows. It teaches the camera operator the kinds of shots that are needed to support the main part of an interview or drama scene. Those all important cut-aways that help a scene flow properly. It’s not just a case of shooting a bunch of random shots of the location but thinking about how those shots will interact with the main shots when everything is edited together. If your shooting drama then it is a huge help if you can visualise how cuts between different shots of different characters, scenes or locations will work. How framing and things like camera height can be used to change the tension or intimacy in a scene. I think one of the best way to learn these things is by learning how to edit and I don’t mean just pressing the buttons or randomly dropping stuff in a sequence of clips. Learn how to pace a sequence, how to make a scene flow, understanding these things makes you a better shooter.

But don’t stop at the edit. Follow the post production process through to it’s end. Learn how to grade with a proper grading tool, not just colour corrections in the edit suite (although it’s useful to know the limitations of these) but things like power windows and secondaries. You don’t have to become a colourist, but by understanding the principles and limitations you will be able to adapt the way you shoot to fit within those limits. It is  a good idea to find a friendly colourist that will let you sit in on a session and explain to you how and why he/she is doing the things being done. There is always the Lite version of Resolve which you can download and use for free. If you don’t have anything to edit or grade then go out and shoot something. Find a topic and make a short film about it. Try to include people, interviews or drama. Maybe get in touch with a local drama group and offer to shoot a performance.

Continue Reading

Shocking Revelation Concerning New Electric Circuits Safety

NEW CIRCUITS

An electrical circuit is a very important device in every home. It is the path through which electricity goes from a power source to an appliance and vice versa.

Are you a property owner planning to install a new electrical circuit in your home? If yes, then you have come to the right place. technicians take pride in knowing when it is necessary to add a new circuit and how to do the job in the cleanest and most efficient way.

As a property owner, it is advisable to always contact a professional company Electric to help you with your electrical needs.  Any residential property must have a solid electrical circuit and, thanks to the team of expert electricians, we have a reliable and efficient service. We will assist you in setting up your electrical circuits. We have a team of electrical professionals who understand the process of installing an electrical circuit. They will ensure that your system is installed safely and efficiently.

Apart from circuit installation and repair services, the experts Electric are proud to offer a wide range of electrical services and some of these include the following:

Residential Services

Commercial Services

Service Calls

New Circuits

Lighting installation

Electrical rewiring

Building Renovations

Electrical Testing Services

Electrical Repairs & Installations

Regular Electrical Maintenance

If you have a home improvement or upgrade project that requires electrical design, circuit installation or maintenance services, you will need the assistance of the experts. team of residential electricians are available to handle all home owner electrical problems.


ELECTRIC CIRCUIT STUDIO

Support for pause and resume simulations, ability to draw wires only by touching element’s pins and wires, placing elements by touching the desired point of the canvas, internal log viewer, view and export of the output results. See the App settings and release notes.

Custom components and subcircuits are new in version 2.5. You can set their SPICE definition, symbol or add a picture. New components will be available from the Web Components in the bottom bar.

Infinite scroller with fast buttons for setting parameter values is new from version 2.3. By tapping the name of the parameter you can set the parameter’s value also by a text dialog.

The time scale can be set manually in the Menu – Circuit Properties or using a horizontal pinch gesture on the Plot window in the Continuous mode of simulation.

is a set of tools used for building electronic circuits, SPICE simulation, and calculation of circuits. These tools are complemented by the information center containing resources, connector pinouts and short interactive book explaining basic electrical theorems, laws and circuits.


Electrical Circuits – How Many Should You Have?

Minimum

The minimum number of electrical circuits  for a new home would be 4/5, as follows;

Lights

General Power outlets (GPOs)

Hob and Oven

Air Conditioning

Hot Water Service (Only if Electric)

Suggested Circuits

A good procedure is to have separate circuits for rooms that have heavy loads as well as separate circuits for major items.

This gives the following circuits for a 3/4bedroom house

GPOs Kitchen

GPOs Laundry

GPOs Living*

GPOs Bedrooms*

Lighting Living*

Lighting Bedrooms*

Hot Water Service**

Oven

HotPlates**

Centralised Air Conditioning

Phase Power

If you want Reverse Cycle Air Conditioning for a large house or want Instantaneous Hot Water you will need 3 Phase Power. In this case it may be worth spreading the GPO and lighting circuits over the different phases.


New Electrical Circuits

Just because you have sufficient power for your home now is no guarantee that it is going to accommodate any additional demands that you place upon it. While many homeowners are under the impression that just adding circuits to the breaker box will handle any additional demands, this isn’t always the case.

Most homes are outfitted with an electrical panel that is suited to its electrical requirements, with a little room for increased electricity. Adding a circuit or two might be just fine to accommodate your new electrical needs, but it’s quite easy to exceed the safe threshold if you’re not careful.

When do you need to look into adding circuits or updating your electrical panel?

Any time you add an appliance to your home, you are increasing the demand on the electrical system. Consult with a licensed electrician before hooking up a major appliance to determine if your system is ready for the added load.

Whenever you set up a big holiday light display, this is one of the leading causes for needing upgraded circuits.

Hot tubs draw a lot of electricity and are almost always a time for installing new circuits and potentially upgrading your electrical panel.

If adding a new room to your house or other additional square footage is added, this will need to be accommodated by adding one or more new circuits to the system. Depending on the size and electrical requirements of your addition, the increase in amperage could require updating the electric panel as the only viable option.

If you’re unsure about the best course of action, consult with the professionals. We’re always happy to talk with you about all of your options over the phone. We’re happy to schedule an appointment at your property to provide a free estimate too, and to give you an in depth consultation in order to pick the very best course of action for your situation.


New smart Load Center brings app control to your circuit breakers

has announced a new version of its Load Center breaker box for homes, and it’s adding an integrated Wi-Fi or Ethernet hub that will let you manage your home electrical setup directly from your phone. That’s right: smart circuit breakers are here

There have been after-market products that can monitor energy use in your home before, but system goes a step further by integrating smart technology directly into the breaker box and individual circuit breakers, giving homeowners far more information on the power management in their homes.

The smart Load Center works with existing app for Android and iOS, and it gives ridiculously granular data on energy use in your home, letting homeowners track power consumption on a per-appliance or branch circuit basis, get alerts when circuit breakers trip and why they did, or even remotely shut off a circuit breaker from the app. In addition to the Load Center, will also offer smart circuit breakers to go with it, which will use the integrated hub to stay updated with the latest firmware. (It’s a mildly concerning phrase to see in the same context as “circuit breakers that control your home electricity.”)

There’s no word on price or release date, but it’s probable that this will be limited to professional electricians and developers to buy and install in houses they’re building, considering the sheer complexity of installing something like this. (It’s not the sort of hardware that you’ll use on your own for a weekend project.)

If you are building a home from scratch, however, it’s a pretty cool idea. Just remember to label all your circuit breaker switches right the first time around

Continue Reading

Types Of Dog Bite Lawyer

Dog Bite Laws: What You Should Know

Americans love their pets. In fact, according to recent statistics, 85 million families in the United States have a pet. Not surprisingly, dogs are the most popular type of pet, with just over 60 million households having one. While many people think of their dog as a loyal companion, this type of animal is also known to bite and cause serious injuries.

Here are four things you should know about dog bite injuries.

  1. Know How to Protect Yourself From Dog Bites

One of the first things you can do to protect yourself is understand why dogs bite. Some of these reasons include:

  • The dog is feeling stressed.
  • The dog is defending itself or its territory.
  • The dog is protecting toys, food, or other valuables.
  • The dog is scared or startled.
  • The dog is sick or sore and wants to be left alone.

There are also certain breeds that are more prone to biting people. The breeds that are considered some of the most dangerous include pit bulls, Rottweilers, German shepherds, American bulldogs, and huskies. In order to protect yourself against dog bites, you should always be extra vigilant when encountering any of these breeds.

You should teach your children to be cautious as well. You should also remember that despite the fact that some breeds are more prone to biting than other breeds, any dog, even the cuddliest and most even-tempered breed, may bite when threatened.

  1. Know the Types of Injuries Dog Bites Cause

Unfortunately, even when doing all you can to protect yourself, you might still get bitten by a dog. Because of their sharp teeth, a dog bite can easily cause puncture wounds and injuries to the eyes, face, head, and neck. Dog bites can also cause extreme amounts of blood loss, serious infections, ugly scars, and permanent nerve damage.

These types of injuries are usually serious enough to warrant a visit to the emergency room. In some cases, dog bite injuries even cause the victim to become hospitalized. Unfortunately, hospitalizations due to dog bite injuries are becoming increasingly common in Arizona.

According to the Arizona Department of Health Services, during a four-year period, the number of inpatient hospitalizations from dog bites increased 139 percent. In those four years, 2,358 people were hospitalized for at least one night after getting bitten by a dog, and more than 34,000 people were treated in the emergency room.

  1. Know What to Do After a Dog Bites You

If you get bitten by a dog that does not belong to you, the first thing you should do is get medical attention right away. Also take pictures of your wounds, which will help if you decide to file a personal injury lawsuit against the owner of the dog. You will need to get the dog owner’s contact information as well.

If other people witnessed the incident, you should also get their contact information. In order to prevent the dog from injuring others, you will need to file a report with animal control.

As you recover from your injuries, assess your mental health status, as some dog bites can cause emotional trauma and post-traumatic stress disorder (PTSD). If you have experienced either of these, you may want to see a mental health counselor.

  1. Know the Legal Ramifications of a Dog Bite

Not all dog bites result in a personal injury case. However, if you can prove that the dog’s owner acted irresponsibly, you should file a personal injury case. For instance, if the dog owner did not have their dog on a leash, and then it attacked you when you walked by, the owner should be held responsible.

You will also need to prove that you did not provoke the dog in any way and that you were legally allowed to be in the place where the dog bit you. If you can prove that the owner should be responsible, the dog’s owner will have to compensate you for the following:

  • Medical costs, including doctor and hospital bills, medications, physical therapy, counseling, and any other type of necessary treatment
  • Pain and suffering associated with the dog bite or dog attack
  • Loss of wages due to treatment and recovery from injuries

In some states, dogs are allowed one free bite before legal action is taken against the owner. This is not the case in Arizona, as the state does not have a one-bite law.


Liability Issues

Dog bite cases can be rather complicated and the relevant laws tend to vary from state to state. Luckily, when it comes to determining who is responsible for your dog bite injury, Washington is a “strict liability” state. This means that as long as you or the person injured in the dog attack did not provoke the animal, nor were you trespassing on someone else’s property, then the dog owner is liable for any damages caused by the dog’s bites. All you need to determine this liability is proof that the dog bite did indeed cause you injuries. A dog bite attorney with the Advocates is experienced in collecting the evidence needed to determine who is at-fault for your dog bite injury.

Homeowners Insurance Policies

The last thing dog bite victims want to do after being injured in a dog attack is to read a dense and confusing insurance policy. Since most dog bites occur in the home of a neighbor, a friend, or even a family member, many dog bite victims are hesitant about pursuing a dog bite injury claim. We get it. Nobody wants to sue a friend.

What most people don’t know is that in the state of Washington, the dog bite owner’s home insurance policy is what will compensate you for your injuries and losses. Thankfully, homeowners insurance generally covers any dog bite by the policy holder’s dog. Getting an insurance company to cover these types of claims usually isn’t the problem. What is a problem is figuring out if a dog’s owner has some sort of homeowners/renter’s liability policy in the first place. This is why hiring a dog bite lawyer is instrumental in getting you the settlement you deserve.

Workers Compensation

It is certainly unfair that dog bite victims are forced to miss work due to a serious dog bite injury. In Washington State, you may be entitled to compensation for any lost wages and damages suffered from the dog attack. The dog bite attorneys at the Advocates are skilled in helping victims recover the compensation they are rightfully owed for their injuries and losses. Our dog bite lawyers are experts in Washington State laws regarding unprovoked dog attacks. We have handled and fought for thousands of dog bite victims all throughout the state.

Retrieving workers compensation for an unwarranted dog attack can feel like a huge hassle. No one should have to go through the aftermath of a dog bite on their own. Our dog bite attorneys will help you every step of the way.


Breed-Specific Legislation for Dog Attacks and Its Effect on Personal Injury Cases

Personal injury cases based on the breed of a dog can have serious effects through differentiation of the breed and any laws that exist that govern this dog and any injury through attack or bite either provoked or not. Knowing what these laws are, the victim can either increase the strength of the claim or, depending on the circumstances, lessen the strength of the defense.

Getting Rid of the Dog Entirely

There are some states that pass legislation that require the owners of certain breeds to get rid of the dog no matter if the animal is a service dog, comfort animal or part of the family. With these laws in place, the dog can face removal by force and destruction. These laws pass because of past grievous wounds and deaths by the breed and will require other changes to both criminal and civil processes. Breed specific laws can change what the owner can do, what happens in litigation and what outcome is possible based on the circumstances of an incident.

Personal Injury Cases and Dog Breeds

When there is a breed-specific law in place that affects the outcome of a case, it usually benefits the plaintiff when he or she suffered injury because of the dog. The laws increase the strength of the claim because the owner either irresponsibly, unreasonably or unlawfully bred or acquired the dog in violation of the state breed-specific laws that prevent these actions. If the state has strict liability as well as these other laws, the defendant may have little recourse to paying damages when the victim can use the laws against him or her.

The Incident and Injury

If there is a breed-specific law in place in the state where the individual suffered the injury, he or she can use the legislation against the owner of the dog. The injury usually is more severe based on the type of dog, the propensity for damage and how aggressive the animal is generally. The incident may also involve other factors that can increase the strength of the claim such as when the owner of the dog breeds a dangerous animal against city regulations. With all the relevant facts known and in place within the claim, the plaintiff may have a greater chance of success against the defendant.

Complete Bans on the Breed

There are some states that ban the ownership and breeding completely of certain breeds of dog. The state may even warn an owner that having that breed will lead to immediate seizure and destruction if the individual does not comply with the state ban. Other states always have breed-specific limitations for ownership or conditions such as keeping the animal on a leash when outside or not letting the dog out of the house without proper supervision. Other laws could establish a presumption that the breed is dangerous or can inflict greater harm or injury.

The Personal Injury Case with the Breed-Specific Laws

The effect on the personal injury claim when the owner of the breed banned in the state or that has very strict control or conditions of ownership usually extend to multiple aspects of the case. The bite or attack must have medical documentation that the dog caused the injury along with corroboration from a medical professional to that effect. If the state has a strict ban or provides the city with the ability to ban ownership or breeding of certain breeds of dogs, the person that owns the animal involved in the attack could face multiple penalties.


Documenting a Dog Bite

In addition to the first steps outlined above, documentation is also a key component of what to do after a dog bite. First, document any injuries associate with the bite, including visible injuries and the effects of those injuries, such as pain, decreased mobility, and inability to perform certain functions. This documentation can be in the form of photos, journal entries, medical records, and other written records. Additionally, soon after the incident, write down the events and circumstances surrounding the bite with as much detail as you can remember.

Since you may be dealing with an insurance company or a lawsuit, it’s a good idea to document any correspondence you have with others, including witnesses, other parties, and the insurance company itself. In addition, keep records of expenses you incur as a result of the dog bite, such as medical bills, lost wages, and travel costs. The more documentation you have regarding the incident, the easier it will be to assess the amount of compensation you deserve for your injuries.


What is the One Free Bite Rule?

Under traditional Common Law, the liability of a landowner for an animal attack arose out of premises liability. If a landowner was aware of a dangerous condition on his property—including a dog—he had a duty to protect and/or warn certain persons of the danger. This is called the “One Free Bite Rule” or “One Bite Rule” for short. Until a dog displays hostile behavior toward a person, the owner was basically relieved of responsibility if he attacked someone unprovoked. Once the dog had attacked someone, the owner became charged with the knowledge, and a duty to protect or warn arose.

This law is still in effect. Because the burden of proving knowledge can be very difficult, this is the hardest way to make a case against an irresponsible pet owner.  In order to prove a case, you must generally find evidence of prior attacks or aggressive behavior.  Contacting the local animal control department is one resource we use to research prior attacks and bites by a pet.  Often people who live in the neighborhood will have knowledge of other times the dog has escaped and attacked people or displayed aggression.

Witness interviews can be critical early on before the events fade or persons with knowledge move away.  It is important that you have a Houston dog bite attorney with the resources and knowledge to do the proper investigation.

Continue Reading

Water Testing To Enjoy Your Swimming Pool And Spend Less Time And Money

Drinking Water Testing

Drinking water program helps protect the health and safety of the community by assuring safe and reliable drinking water. The drinking water program divides wells and water systems into 4 categories, each of which has different levels of oversight and different standards that they must meet. The different types of water systems are:

Individual wells that serve 1 residential dwelling unit (single family residence)

2-Party (or shared) wells that serve 2 residential dwelling units or 1 or 2 businesses serving less than 25 people and customers per day

Group B Community Water Systems which serve 3 to 14 residential dwelling units (single family residences)

Group A Community Water Systems which serve 15 or more connections or serve 25 or more people per day for 60 or more days per year

Individual Wells

The Health District defines individual wells as a well that serves 1 residential dwelling unit. A residential dwelling unit is a single family residence. These wells have the least amount of oversight and regulation. They are required to meet the well drilling standards in, WAC 173-360, but beyond that, they are the responsibility of the well owner to maintain and operate.

2-Party (or Shared) Wells

The Health District defines shared wells as a well that serves 2 residential dwelling units (2 houses, a duplex, a house and accessory apartment, etc.) or a well that serves a structure such as a business, club house, meeting hall, church, etc. that serves less than 25 people per day. The latter may also be in the shared well class if it serves more than 25 people per day as long as it is for less than 60 days per year.

An approval from the Health District is required for shared wells. This approval involves assessing the area within 100 feet of the well for potential sources of contamination, the well construction, some water testing (coliform and nitrate tests) and the requirement for a water user’s agreement and covenant

Group B Community Water Systems

Group B Community Water Systems serve 3 to 14 houses as long as the number of people living in those houses totals less than 25. If the system serves 25 or more people per day for fewer than 60 days per year, it is also classed as a Group B Community Water System. Group B Community Water Systems are regulated under, WAC 246-291. The Health District is responsible for regulating Group B Community Water Systems that have 3 to 9 connections. This includes approving new (or existing unapproved) Group B Water Systems, making sure appropriate follow-up is done when a Group B Community Water System has a bad monitoring sample, verifying that the system is currently in compliance with the regulations (usually for mortgage purposes), approving additional connections to an existing system, and other things.

Group A Community Water Systems

Group A Community Water Systems are systems the serve 25 or more people per day for 60 or more days per year or the system serves more than 1,000 people per day for 2 consecutive days.


Water Testing

Citizens often ask if the City will test water from their home. Sometimes this is because people are concerned about lead. While lead has NEVER been detected in the water system, some homes may have leaded brass fixtures or copper pipes with lead solder. Sometimes citizens get their drinking water from their own private wells, and they are interested in having their water tested for nitrates, bacteria, or other contaminants

does not perform water testing for the general public. There are other ways you can get your water tested. A good resource is the County OSU Extension Service and their Water Testing Web Page. This page is focused on well water, but is also a good resource for water testing in general

If you choose to have your water tested for contaminants, make sure to use a certified laboratory. The Health Authority maintains a list of water testing laboratories that are certified to test drinking water and who will perform testing for the general public


Water quality testing

Water sampling wherever and whenever you need it

Regular water sampling by our water quality testing experts ensures your business remains up and running. It also helps you comply with applicable Health & Safety regulations for the region your vessel is located in.

Sampling services

Our sampling services include assessments of the chemical, microbiological and physical water condition as well as the identification of possible health risks signalled in the analisys reports.

Self-sampling kits

We have configured self-sampling test kits, which allow your crew to take samples themselves, limiting the amount of people coming on board. We provide you with clear instructions and arrange the samples to be analysed worldwide. Our team is ready to report you on the results asap. The current international health crisis is affecting yours and our normal operating business in a profound way. Although drinking water is considered safe from the corona virus, there are still important measures concerning drinking water hygiene we can support you with

Water quality consultants

the water quality testing teams consist of sampling technicians as well as consultants. Our water quality consultants can provide you with the best advise on water management plans and quality assessments as well as training options for all professionals responsible for water quality on board.

When should you contact us for water analysis?

Regulations require continuous testing of your water quality. Make sure you book a sampling session in due time, so you will meet these requirements and can do so at a convenient moment. In addition


Field Water Testing and Analysis Instruments

Field studies are necessary to modern study of the environment. Campaigns that focus on taking samples—whether of air, water, or soil—and analyzing those samples in one location provide tremendous benefits to our knowledge of the environment and of any changes that occur over time. To accomplish such studies, portability of instruments is key

Scientific instruments are typically not small. As the analytical capability of instruments improved from the 1960s onward, they became even less portable: most spectrometers—often several instruments in tandem, heavy and larger than a standard door frame—weren’t going anywhere outside the lab. But in the past 20 years the increase in complex fieldwork necessitated instruments that can travel outside the lab but still provide the same type of analytical power researchers are accustomed to in the lab.

The Ocean Optics device, developed in 1992, was the first miniature spectrometer the company developed. Today Ocean Optics has a wide range of miniature spectrometers that are smaller, more sensitive, and digitally capable. Owing to their portability they have been used in volcanos and on the Mir space station.

Similarly, the Millipore testing kit, dating back to the 1950s, has been used by not just scientists but individuals like municipal workers. Millipore has also led the charge to send its testing kits to parts of the globe affected by dramatic flooding so that aid workers, government employees, and citizens alike can test their water supply.

Savvy users of analytical instruments, including the atmospheric scientists interviewed by the Institute staff, continue to modify and develop better portable instrumentation.


Get Water Testing

Water from private wells is not monitored for quality by government agencies. Wells are directly linked to groundwater and they can become contaminated if agricultural chemicals, runoff from animal enclosures, fuels, household wastes, or other contaminants accidentally enter them. It is the responsibility of the homeowner who owns a private well to periodically test their well for contamination. Water testing helps ensure that your drinking water is safe.

Laboratory does not provide water collection services. Real estate agents, homeowners or buyers can collect and deliver the water sample using our water collection kit. In a real estate transaction it is the lender who determines what testing is required. Check with the lender if there are third party collection requirements.

Safe Drinking Water Act

The federal Safe Drinking Water Act doesn’t apply to private wells, only to public drinking water systems.

Individual well owners have primary responsibility for the safety of the water drawn from their wells.

Continue Reading

My Accountant Report

Explanation of T Account, Debit and Credit, and Double Entry Accounting System

The Accounting Definition

Debits and credits serve as the two balancing aspects of every financial transaction in double-entry bookkeeping. Debits are entered on the left side of a ledger, and credits are entered on the right side of a ledger. Whether a debit increases or decreases an account depends on what kind of account it is. In the accounting equation Assets = Liabilities + Equity, if an asset account increases (by a debit), then one must also either decrease (credit) another asset account or increase (credit) a liability or equity account.

Another way to help remember debit and credit rules, is to think of the accounting equation as a tee (T), the vertical line of the tee (T) goes between assets and liabilities. Everything on the left side (debit side) increases with a debit and has a normal debit balance; everything on the right side (credit side) increases with a credit and has a normal credit balance. (Note: a normal balance does not always mean the accounts balance will be on that side, it’s simply a way of remembering which side increases it).


Double-Entry Accounting Defined

True to its name, double-entry accounting is a standard accounting method that involves recording each transaction in at least two accounts, resulting in a debit to one or more accounts and a credit to one or more accounts.

The total amount of the transactions in each case must balance out, ensuring that all dollars are accounted for. Debits are typically noted on the left side of the ledger, while credits are typically noted on the right side.

Public companies must follow the accounting rules and methods dictated by generally accepted accounting principles (GAAP), which are controlled by a nongovernmental entity called the Financial Accounting Standards Board (FASB).

Double-entry accounting also serves as the most efficient way for a company to monitor its financial growth, especially as the scale of business grows.

Keeping Accurate Books

As a company’s business grows, the likelihood of clerical errors increases. Although double-entry accounting does not prevent errors entirely, it limits the effect any errors have on the overall accounts.

Because the accounts are set up to check each transaction to be sure it balances out, errors will be flagged to accountants quickly, before the error produces subsequent errors in a domino effect. Additionally, the nature of the account structure makes it easier to trace back through entries to find out where an error originated.

Account Types

When you employ double-entry accounting, you will need to use several types of accounts. Some key account types include:

  • Asset accounts show dollars associated with things a business owns, such as the cash in its checking account or the price paid for its warehouse.
  • Liability accounts show what the firm owes, such as a building mortgage, equipment loan, or credit card balances.
  • Income accounts represent money received, such as sales revenue and interest income.
  • Expense accounts show money spent, including purchased goods for sale, payroll costs, rent, and advertising.

The double-entry system requires a chart of accounts, which consists of all of the balance sheet and income statement accounts in which accountants make entries. A given company can add accounts and tailor them to more specifically reflect the company’s operations, accounting, and reporting needs.


Double-entry accounting system and its rules

The double-entry rules can be helpful when we need to find a mistake in financial records. If total debits do not equal total credits, there must be a mistake. However, this system cannot ensure complete accuracy. For example, even if debit balances equal credit ones, an error may still be present because a wrong account was debited (or credited) when the entry was made.

The two important rules about the double-entry recording system are as follows:

  • Assets = Claims (Liabilities and Owner’s Equity)
  • Total Debits = Total Credits


Debits and credits

In double entry bookkeeping, debits and credits are entries made in account ledgers to record changes in value resulting from business transactions. A debit entry in an account represents a transfer of value to that account, and a credit entry represents a transfer from the account. Each transaction transfers value from credited accounts to debited accounts. For example, a tenant who writes a rent cheque to a landlord would enter a credit for the bank account on which the cheque is drawn, and a debit in a rent expense account. Similarly, the landlord would enter a credit in the receivable account associated with the tenant and a debit for the bank account where the cheque is deposited.

Debits and credits are traditionally distinguished by writing the transfer amounts in separate columns of an account book. Alternately, they can be listed in one column, indicating debits with the suffix “Dr” or writing them plain, and indicating credits with the suffix “Cr” or a minus sign. Despite the use of a minus sign, debits and credits do not correspond directly to positive and negative numbers. When the total of debits in an account exceeds the total of credits, the account is said to have a net debit balance equal to the difference; when the opposite is true, it has a net credit balance. For a particular account, one of these will be the normal balance type and will be reported as a positive number, while a negative balance will indicate an abnormal situation, as when a bank account is overdrawn. Debit balances are normal for asset and expense accounts, and credit balances are normal for liability, equity and revenue accounts.


T-Account

Accounting records about events and transactions are recorded in accounts. An account is an individual record of increases and decreases in a specific asset, liability, or owner’s equity item. Look at accounts as a place for recording numbers related to a certain item or class of transactions. Examples of accounts may be Cash, Accounts Receivable, Fixed Assets, Accounts Payable, Accrued Payroll, Sales, Rent Expenses and so on.

An account consists of three parts:

  • Title of the account
  • Left side (known as debit )
  • Right side (known as credit )

Because the alignment of these parts of an account resembles the letter T, it is referred to as a T account . You could draw T accounts on a piece of paper and use it to maintain your accounting records.

Continue Reading

House Cleaning Hints For Busy Moms

A step-by-step guide to spring cleaning your house in one weekend

Spring-cleaning: We dread it and we procrastinate for as long as we can until we finally give in. It’s no secret that spending an entire weekend cleaning sounds like an absolute nightmare – but with a little elbow grease and a lot of willpower, it’s easier than it sounds

Make a list

“Once you’ve figured how much you want to tackle, write down all the tasks you plan to handle,” she says. “If you are planning to clean over a weekend, break down the tasks day by day. Having a clear list of everything you need to clean will help you determine the supplies as well as your schedule (because you’ll definitely need to take breaks to relax!)”

Time yourself

“Decide on an interval (30 or 45 minutes is a good place to start), and set a timer,” she says. “Clean in a focused manner during that time, and when the timer goes off, treat yourself to a break.” Schedule backup. “Spring-cleaning is a daunting task,” she says. If some tasks that seem overwhelming or overly complicated, she suggests outsourcing part of the job – and claiming back your life.

Start with your closets

“Rid your closets of clothing, shoes, and accessories that you haven’t worn for a full season,” says, the founder and chief development officer of Everything But the House. “If you didn’t wear it over the winter, you are not going to wear it next winter.”

Edit your home office

“The home office is another space that should be addressed,” she says. “Once you’ve filed your taxes, file or shred that stack of paperwork and organise the pile of correspondence that has gathered.” This may also be a good time to organise your computer and make sure all your paperwork is filed digitally.


How to Keep a House Clean Every Day of the Week

Keeping your home tidy might seem like an impossible task—but it doesn’t have to be. We put together some of the best tips so you and your family can learn how to keep a house clean every day of the week

leaning their house, according to the Bureau of Labor Statistics. Between work, errands, parenthood and the chaos of everyday life, learning how to keep a house clean can be one of the toughest lessons we learn. While it sometimes seems impossible to manage everything on your plate, there are some quick and easy tips to help you get your house (and your life) in order. Read on for everything you need to know about how to keep a house clean.

Put everything away after use.

This might seem like an obvious tip, but failing to put away your belongings is the main culprit of untidiness. As you move from one room to another, do a quick scan to see if there’s anything that you can take with you. Go out of your way to make sure that anything you wear, use or move ends up where it belongs. It’s easy to leave a pair of shoes near the front door, a few shirts on your bed and some dishes in the sink until tomorrow. Remember, those tiny piles can quickly turn into big messes.

If you’re lacking space, consider some DIY closet organization ideas like tension rods and shower curtain hooks. Use over-the-door organizers to extend existing spaces in your bedrooms, bathrooms and hall closets. Corral your smaller belongings with decorative baskets and organize your paper items with a mail sorter. And remember: it takes much less time to put away your belongings each time than to frantically run around looking for them when you need them again!

Do one room at a time.

The easiest way to keep your entire house clean is to tackle one room at a time. By splitting up the cleaning by room (and by day), you can accomplish a little bit at a time instead of tackling every task at once.


A Guide to House Cleaning Contracts

Get the most out of your house cleaning service by signing a contract.

Having a regular house cleaning service can add to your quality of life by ensuring that you live in a clean environment and allowing you more time to enjoy life. It’s estimated that a family who cleans their home daily gains back about 30 days per year when they hire a house cleaning service

Many of us choose to DIY our housecleaning however, if you are a parent, are working full time, have family members with severe allergies, or are physically unable to clean, consider hiring a professional cleaner. When hiring a cleaning service or person to keep your home clean and well-kept, you’ll want someone who is reliable and certified. To maintain order and make sure you’re receiving quality work under your terms, sign a contract with your housekeeper.

Average costs

The average cost of a house cleaning service can be around $200 a visit. The cost of hiring a maid or cleaning service can depend on various factors. The square footage of the home is the biggest influencer on cleaning costs, with the number of bedrooms and bathrooms being the largest cost differentiator. Having multiple floors or pets can also influence the cost, as will the overall scope of work like cleaning inside cabinets, making beds, or cleaning inside appliances

House cleaners base their pricing generally on the number of hours it will take to clean the home but might also charge more if you require specialized cleaning products or difficult cleaning tasks. A quality home cleaning service company will make an in-home estimate and walk through all the rooms with the homeowner to fully understand the level of cleaning expected.  If a team of 2 or 3 cleaners is involved the cost will increase but they may be able to complete the tasks faster than just one professional.


HOW TO TREAT YOUR HOUSEKEEPER

Hiring a housekeeper is an excellent way to not only keep your house looking great, but also to free up valuable time for you to engage in other events and activities. However, if you’ve never had a housekeeper inside your home before, you may not know how to act around them. It’s a new experience, and you aren’t alone in wondering how to make the experience pleasant for both you and your house cleaner.

Clean Up the Clutter Before Cleaning Day

Wait, what? You’re supposed to clean for the housekeeper? Well, not exactly, but there are a few courteous things that you can do to make it easier for them to do their job. For starters, gather up your mail; don’t have it scattered all over the place. The housekeeper will need to pick everything up and move it in order to clean the tables, so it’s better to have everything neatly piled or put away before the maid comes. Move pet toys out of the way so that it’s easier to vacuum, and clear up the clutter around night stands. Basically, move the little objects out of the way that might cause the housekeeper trouble while dusting and cleaning.

Open Dialogue with your House Cleaner

You like things a certain way. Certain rooms need more attention, and you may want certain objects cleaned in a specific way. If you don’t tell your housekeeper these preferences, then there’s no way for them to know. After all, they aren’t mind-readers. So make sure to engage in open dialogue with your maid and give them clear instructions.

Obviously, you don’t need to tell them how to clean everything. However, if you have specific preferences (maybe you like the vacuum lines in the carpet), or want objects put away in a specific fashion (such as plastic cups on the bottom shelf so it’s easier for kids to grab), then tell the housekeeper ahead of time. When you have the same maid coming every time, you probably won’t need to keep reiterating your instructions. With that said, many housekeepers have dozens of houses to clean every week, and everyone has their own instructions, so it may be a few visits before they’ve memorized your instructions. Leaving positive, helpful notes can help remind cleaners of your specifications — especially if you have rotating housekeepers.

Should I Tip my Maid?

Tipping is never required, but it is always appreciated.  Some customers leave a tip every time a maid cleans, and others tip occasionally or during the holidays. If you appreciate their efforts, consider leaving a tip. Or, simply leaving a note thanking them helps them know that they’re meeting your expectations.


Week schedule to a clean and organized house

Summer is over an school is back in session. That means that late summer sleep schedules and lazy, unplanned days have come to crashing halt. It also means that my unorganized summer ways have left my house in a dirty, unorganized mess! I’m kind of looking forward to some structure, and I’m going to kick it off by getting this place in shape. I’m going to focus on one space a day and try to get my life in order … I mean my house!

I’m a moderate minimalist. I don’t want our home to be sparse and bare, rather selective and edited. Living simply doesn’t exactly come easy to me, but I’m learning, and it’s making my family’s life easier.

Some positives I’m seeing from living a more minimal life:

Less mess to clean up.

Saves money not shopping for unneeded things.

Makes everyday life and trying to find things simpler.

Helps use available space to its full potential.

Feels peaceful in a clutter-free home.

Simply put, the less you have, the better it will fit into your home and the less organizing you will have to do. These are my personal guidelines for owning and editing the things at our house

Every thing needs it’s own spot to be put away.

A place for everything and everything in its place, as they say. Bills, bags, books — each item needs it’s own space. If there isn’t a specific spot for an item on a shelf or in a basket somewhere, it will never be put away, and be left to sit out

Try not to own more than one of something.

I understand this doesn’t work with everything, because we each have a passion or two that calls for extras. For example, my husband likes to cook and has, in my opinion, a knife or 10 more than we need. But I think he’d tell you I don’t need to keep 10 cans of paint sitting around in the garage for my projects. But when we were purging, we both agreed we didn’t need two weed wackers or five kinds of pasta strainers, etc. Ditch the duplicates

Continue Reading

Choosing The Right Dentist For You

Things that happen if you avoid the dentist

Many people believe good oral care means they only need to brush their teeth once or twice each day, and floss once daily. While these are important actions, it’s also necessary to schedule regular dental appointments for a checkup and professional teeth cleaning.

Consider four things that happen if you don’t:

  • Tooth decay – Daily tooth brushing and flossing help keep plaque under control. Plaque is created by food particles that join with bacteria to form a substance that adheres to teeth. If not removed, plaque can break down tooth enamel and cause decay. During regular dental checkups, dental professionals clean and remove plaque. Skipping these appointments allows bacteria to flourish and attack your teeth and gums, and create decay that may require extensive restorations, such as a root canal or crown, and also cause bad breath.
  • Gum disease – Untreated tooth decay can lead to gum or periodontal disease. The gums are designed to provide a tight cover around your teeth and roots. Plaque bacteria can attack the gums, causing swelling and bleeding, allowing bacteria to settle underneath. If not treated properly, this condition, called gingivitis, can lead to periodontal disease.
  • Health problems – During a checkup, dental professionals also may detect signs of serious medical problems. Catching these problems early may help you avoid expensive medical bills. If you don’t regularly see the dentist, health problems, such as hypertension, diabetes, oral cancers, kidney failure and heart disease may not be discovered until they’re in a more advanced stage. Often it’s because people see their dentist more often than their regular medical doctor.
  • Stains – Drinking coffee, tea and wine, or smoking cigarettes can stain teeth and create an unattractive smile. Professional teeth cleanings help remove stains. However, dark discolorations may require cosmetic dentistry procedures to remove stains and whiten teeth.


What to Expect at the Dentist

A visit to the dentist doesn’t have to be something to dread. Dentists and hygienists want to help, and they’ll usually try to make your office visit as easy as possible.

You can often watch movies or TV. They may break up work into many visits so it’s not too much in one sitting. And there are options for pain relief or sedation during procedures.

Making it to the chair puts you closer to better health and smiling with more confidence.

Before the Appointment

Plan enough time off from work or school to feel less rushed or anxious about getting back. When you make your appointment, ask how long a cleaning and exam usually take, then add extra time to that. You’ll be in the dentist’s chair longer if it’s been a while since your last visit. An end-of-day appointment is a good option so you can go right home.

If you have dental insurance, see if your dentist is in-network to save money. You may have to pay a co-pay when you’re at the office, or your dentist might bill you the balance after your insurance pays them. If you don’t have insurance, find out ahead of time how much you should plan to pay at your appointment.

On the day, get there early so you can fill out paperwork (or turn it in if forms are available online ahead of time) and give the staff time to set you up. Have your driver’s license and insurance card ready when you check in at the reception desk.


A Routine Visit

A dental hygienist covers your chest with a plastic or paper cloth, and you may get eye shields to wear, too. You’ll see a tray of metal and perhaps ultrasonic tools. The hygienist uses these, working a tooth at a time, to scrape off any hard buildup of plaque and tartar on the surfaces and along your gumline. They may floss between your teeth, too.

If your jaw hurts or you have mouth pain while they’re cleaning, let the hygienist know. You can have rest breaks when you need them.

After that’s done, you’ll rinse well. Using a tool with a spinning head, the hygienist polishes your teeth. You might even get to choose the flavor of buffing paste. And you’ll rinse again.

Typically, you’ll get X-rays every year or so to help find problems that are just starting or are hard to see.

Then the hygienist brings the dentist in to do a thorough exam, checking each tooth and looking for pockets or gaps between your teeth and gums.

A tool called a periodontal probe, which could be metal or ultrasonic, helps the dentist find problem spots. It can also measure the depth of any gum pockets. The hygienist often stays to record notes in your chart.

Afterward, the dentist will talk to you about how things are looking and what’s next.


After the Visit

If your mouth is sore, you can take over-the-counter pain relievers.

Call the office between routine visits if you have questions, your teeth hurt, or your jaw swells. Issues like broken teeth are an emergency, and you should let your dentist know right away.

Follow-up Care

When your mouth is healthy, you should probably get a cleaning and exam every 6 months. Depending on what the dentist finds during your exam, they’ll recommend a treatment plan, dealing with the most needed care first.

To take care of problems, you’ll likely need to come back sooner than you would for another routine visit.

You may need fillings to close up cavities in the teeth before they get larger. For more serious decay, crowns surround and cover the core of the damaged tooth, keeping the root in place. This “cap” is cemented in place to look and feel like the real thing.

Cosmetic bonding, veneers, and shaping can improve the appearance of any broken and discolored teeth. Ask your dentist about options for improving your overall smile.

To start healing gum problems, scaling and root planing clean the sides of the teeth below the gumline so the gums can tighten up around the roots better. You may need X-rays every 6 months to check your progress.

If the dentist finds infection or swelling in the roots of a tooth, you might need a root canal. This treatment involves opening the tooth and cleaning the inside before closing it back up. You may need to see a specialist called an endodontist.


Dental X-Rays

Overview

Dental X-rays (radiographs) are images of your teeth that your dentist uses to evaluate your oral health. These X-rays are used with low levels of radiation to capture images of the interior of your teeth and gums. This can help your dentist to identify problems, like cavities, tooth decay, and impacted teeth.

Dental X-rays may seem complex, but they’re actually very common tools that are just as important as your teeth cleanings.

Why dental X-rays are performed

Dental X-rays are typically performed yearly. They can happen more often if your dentist is tracking the progress of a dental problem or treatment.

Factors affecting how often you get dental X-rays may include:

  • your age
  • your current oral health
  • any symptoms of oral disease
  • a history of gum disease (gingivitis) or tooth decay

If you’re a new patient, you’ll probably undergo dental X-rays so that your new dentist can get a clear picture of your dental health. This is especially important if you don’t have any X-rays from your previous dentist.

Children may need to have dental X-rays more often than adults because their dentists might need to monitor the growth of their adult teeth. This is important because it can help the dentist determine if baby teeth need to be pulled to prevent complications, such as adult teeth growing in behind baby teeth.

Continue Reading

Deep Cleaning Your Home For Health And Hygiene

The ultimate guide to deep cleaning your house, with room-by-room checklist

Deep cleaning is all about the details. When you take the time to clean the things in your home that are a little harder to get to, you’ll notice how it makes your place feel more tidy and welcoming. To get started, create your cleaning schedule, pick a room, and make a quick run to the store. Then, get ready to tackle all of the details that are covered in our deep cleaning tips.

How often should you deep clean?

There are a few different ways you can begin to integrate deep cleaning into your home upkeep routine. If you’ve done any spring cleaning in the past, that’s great! Spring is the perfect time to declutter, clean, and organize, but you should also deep clean more frequently than one season a year. One schedule you can choose to follow is seasonal, or about one weekend deep clean every 3 months. Another option is to break down your deep cleaning checklist into smaller monthly or weekly tasks, tackling one room per month, or 1-2 tasks per week, so that you chip away on an ongoing basis.

What you’ll need

You don’t need fancy specialty cleaners to deep clean your house. Common products like white vinegar, baking soda, dish soap, a scrub brush, and microfiber cleaning cloths are effective and easy to find.

Here’s a starter list to help you stock your cleaning cabinet or caddy:

Rubber gloves

All purpose cleaner (or homemade)

Glass cleaner

Baking soda

White vinegar

Dish soap

Sponge

Scrub brush

Detail brush or old toothbrush

Squeegee

Plastic bucket

Spray bottle

Microfiber cloths

Cleaning cloths (like dish towels or rags), or paper towels

Vacuum with attachments
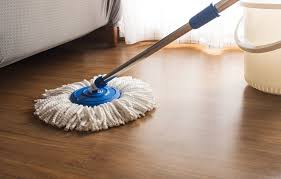
Mop or steamer

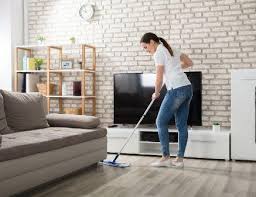
Broom or vacuum with a hard flooring setting

Two simple homemade cleaning products

Baking soda paste and one to one vinegar spray are both used throughout our deep cleaning tips. To make the one to one baking soda paste, start with a cup of baking soda and add splashes of water until it forms a paste similar to the consistency of wet sand.

Tip: If you are sensitive to the scent of vinegar, you can add a few drops of any essential oil (like citrus or lavender) to temper the aroma. A squeeze of lemon is a simple fix if you can’t find essential oils.

Tip: Look for the gallon jug of white vinegar and the large bag of baking soda. Buying multiples of the regular sized boxes is perfectly fine but it is more cost effective if you can find the large bag at your local store.


The Ultimate Guide to Deep-Cleaning Your Home

A deep-clean of your house can quickly turn into a multiday affair that ruins your weekend. But it doesn’t have to be. Nor does it need to be an annual event that only happens during a fit of productivity in the spring. There’s no time like the present to tackle your to-do list—we swear it’ll be worth it and over in a flash. “Start at one end of the house and focus on one room at a time,

As you go from space to space, collect the items that don’t belong and either move them to their proper home or to the front door, where you can later recycle, toss, or donate them.

We’re talking your fridge and your cabinets, both of which you can clean with an all-purpose spray and a rag. “Not only is this a great time to clear out old condiments, but you should also pull everything out and wipe down each shelf and drawer,”

recommends simple dish soap and warm water for most surfaces, but you can DIY your own formula for countertops that stain easily, like linoleum. Her go-to: baking soda and warm water.

Don’t forget the details.

Specifically, the oft-overlooked garbage can. Rinse it with warm water, says and then wipe it down inside and out with an all-purpose cleaner.


Ultimate Deep Cleaning Guide

The thought of deep cleaning your house can be overwhelming, especially if its something you haven’t done in a while or if you don’t know where to start and what you should be focusing on. This Ultimate Deep Cleaning Guide

Why Bother Deep Cleaning Your Home?

Deep cleaning your entire home can be a time-consuming process that a lot of people would rather not do. Which is completely understandable, I mean who wants to spend their free time cleaning when there are a TON of other things to get done. But taking the time to clean your house from top to bottom has a lot of tangible benefits including

Reducing the symptoms of allergies and asthma

Reducing the spread of germs and bacteria (particularly helpful during cold and flu season)

Cuts down on the time you’ll need to spend keeping your house clean on a daily basis

Keeps bugs and other pests away

Makes it easier to find the things you need

There are also psychological benefits of having a clean house which include

Improved quality of sleep

Reduces feelings of stress and anxiety

Improves mood and decreases symptoms of depression

Increases productivity

Improves your ability to focus

How often should You be deep cleaning

You can get away with only doing one deep cleaning a year but I highly suggest doing it at least twice. Generally, I do one at the end of the summer and again in the spring. Doing a deep cleaning at the end of the summer helps me transition the house from summer to fall/winter and gets the house cleaned before the rush of the holiday season starts. Doing a deep cleaning in the springs helps me get the house cleaned after being closed up during the cold winter weather.


ULTIMATE GUIDE TO DEEP CLEANING YOUR HOME

With summer upon us, and life for many of us slowly returning to normal, it can be a good time to do a deep clean of the home. With many of us having been home for the past few months, and now the summer in full swing, it can be a good time to make sure that our homes are clean and tidy, in an effort to help us all to be as healthy as possible. Whether you have had symptoms of COVID-19 or not, making sure that you are living somewhere free from germs is a good idea right about now, especially as we all start to go out and about more. But what is the difference between a deep clean of the home, and the normal maintenance that will happen through the year?

A regular cleaning routine for maintenance is a much lighter clean, and it helps to keep surfaces clean and clear, and helps you to keep your house in order each week. A deep clean, needed every so often, is a much deeper process and it is also much more detailed, to help to set you up for the summer (or whatever time of year you are looking at). Here are some tips and tricks to make sure that you are deep cleaning your home properly and really making the chance of deep cleaning count.

How to Deep Clean

One of the best things to do is to write yourself or set yourself a plan for how you want things to go. Then you can check off what you have done and when, and know what is next, and when you’ll be able to fit it all in. Starting off with making a list of rooms in the house is a really good idea, and then you can make a note of the tasks needed in each room. There is definitely something satisfying about ticking something off your list as you go, so get your plan and lists sorted! It might be best to give yourself plenty of time to get it all done, for instance, over a couple of weekends. Unless you have time off work and are ready to get it all done in a day or two. It will also depend how big your home is, as to how long this will all take.

If you’re not really sure where to start with all of this, then here are some ideas and prompts to help you to plan the cleaning out. It will vary, depending on your home, of course. But here are some of the things that you can do room by room in your home.

Bathrooms and kitchen

What are some of the tasks to do in the bathroom? Of course, there will be the usual bathtub cleaning and toilet cleaning that would happen each week anyway. But what is needed for a deeper clean?

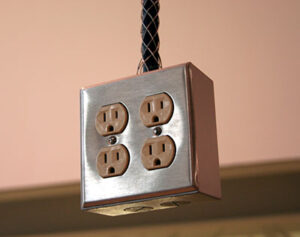
Disinfect and dust door handles and light switches in the bathroom. Check any of the corners of the room for cobwebs too. Peppermint oil is a great essential oil to repel spiders, if you find that you have a recurring problem.

Clean the bathtub, shower, sinks, and toilets, as you would normally. It can be a good idea to go a little deeper though, and scrub the tiles, the grout, and the whole of the toilet, not just the inside. Germs can fester on the outside of the toilet too, as well as the seat.

If you have shower curtains that are looking quite moldy, then they can be taken off and washed. If not, they will need to be replaced. Shower screens will need to be cleaned with a limescale cleaner, and using a squeegee can be a good idea to make sure that you don’t get water marks on the glass when you’re rinsing it off.

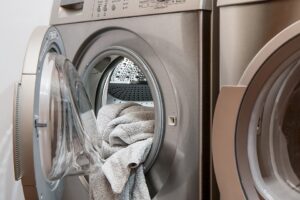
Wash all of your bathroom towels and bathmats. A hot wash, without fabric conditioner is best.

Cleaning mirrors and disinfecting any of the surfaces in the room is a must. Some surfaces, especially corners, can get a little covered in mildew, so that is something to remember.

Clean the bathroom windows, and allow plenty of ventilation, especially if the bathroom is a little moldy.


How to Deep Clean Your House in 7 Days

Deep Cleaning Your Home

You have decided that it is time to get your house in order and to keep it clean. After you have followed my plan for decluttering your home, you are ready to give it a deep cleaning. If your housekeeping has been neglected for a while, or if you have just moved into a pre-owned house, this may be a big project. You may be able to knock it out in one weekend, but if not, follow my 7-day plan for deep cleaning your home.

Once you are done, you can follow my weekly cleaning schedule to keep it sparkling and beautiful. You will be amazed to discover how much a clean home positively affects your mood and those in your family.

How to Deep Clean Your Kitchen

Your kitchen needs a general cleaning every night after supper. For the deep cleaning, you need to focus on the large appliances, as well as all kitchen surfaces

Here are some items that will need special attention:

Refrigerator: Starting at the top, take everything out, cleaning each shelf as you go. If a shelf is removable, take it out and clean it with warm soapy water. Most drawers are removable and should also be washed this way. Don’t forget the small shelves inside the door. Wipe down the outside of the fridge, paying special attention to the handles.

Oven: If you do not have a self-cleaning oven, use a cleaner such as Easy Off. For standard ovens, consider lining the bottom with aluminum foil for easier future cleaning. This will not work with convection ovens.

Microwave: Take out any removable trays and wash in warm, soapy water. Wipe out and scrub if necessary with an all-purpose cleaner.

Small appliances: Clean out all the crumbs in your toaster and toaster oven. Wipe down the surfaces of all small appliances.

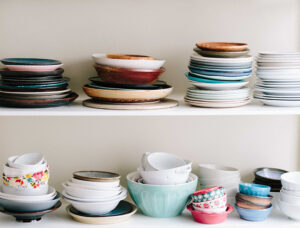
Cabinets, shelves, drawers: Grab a damp rag and clean spots, spills and splatters with an all-purpose cleaner like Fantastic. This is a job kids can help with.

Counter-tops: Remove everything from the counters and wipe down with an all-purpose cleaner.

How to Deep Clean Your Bathrooms

Bathrooms can get pretty nasty if they have not been cleaned regularly. The problems areas will most likely be the tub and shower. Follow these tips for deep cleaning your bathrooms:

Showers/tubs: If you have a shower caddy, take it out and wash it. It may even need to be replaced. Clean the shower head with an old toothbrush and bathroom cleaner, like Soft Scrub. You may need some heavy duty cleaners for soap scum build-up or mildew stains. The toothbrush works well on tub jets and other small, hard-to-reach places.

Sinks and counter-tops: Take everything off of the counter and wipe down with a bathroom cleaner. Use a toothbrush to scrub away dirt around the drains and faucets.

Toilet: Squirt some cleaner into the toilet, swish it around with the toilet brush, and leave it to soak awhile to fight any stains.

Cabinets and drawers: Wipe down with an all-purpose cleaner.

Continue Reading

Things To Consider While Choosing A Rodent Control Company

Rodents

Rodents make up the most numerous group of mammals, with 2277 species, accounting for 41% of the known mammals. They are a very diverse group in both size and habitat, ranging from the South American capybara weighing up to 66kg, to the Baluchistan pygmy jerboa, the female adults of which weigh less than 4gm.

Types of Rodents

Rodents are found on every continent except Antarctica. They live in a wide range of different habitats from snow-covered tundra to hot deserts. Some species of rodent are also the common invaders of the human environment:

Rats

Mice

Voles

Squirrels

Marmots

Hamsters

Guinea pigs

Gophers

Prairie dogs

Porcupines

Beavers

Capybaras (but not rabbits, hares and shrews).

Characteristics of Rodents

The distinguishing feature of rodents is a pair of continuously growing, incisor teeth in their upper and lower jaw. These teeth grow throughout the life of the rodent so it must continuously wear them down to prevent them becoming too long.

Rodents are known to be the following, depending on their species:

Arboreal

Burrowing

Semiaquatic

They use a variety of different methods of locomotion including quadrupedal walking, running, climbing, bipedal hopping, swimming and gliding. Some are nocturnal and some are diurnal. Rodents tend to be social animals, living in small to very large colonies. They also have the ability to breed rapidly in favourable conditions, which is one of the reasons why they are such a concern when you have an infestation in your home or business.

The majority of rodents are herbivores, feeding on seeds, nuts, roots, tubers, stems, leaves, flowers and fruit. Some are omnivores, eating meat such as insects opportunistically and a small number are carnivores.

Useful rodents

Rodents are not just pests, they have been used throughout history for food, fur, and more recently as pets and laboratory animals. Guinea pigs were a major meat source for the Incas, while dormice were a delicacy of the Romans, who kept them in special pots and enclosures. Many cultures around the world still eat wild rodents because they are readily available sources of meat.


How to Get Rid of Rats

A rat elimination program usually consists of sanitation and rat removal. Sanitation will help eliminate the food and water sources rats are using to survive, which also helps in the prevention process. Rat removal methods will vary depending on the personal preferences of the structure owner and their individual level of infestation.

Sanitation is the single most important measure of control in getting rid of a rat problem. Rats must have access to a ready supply of food and water to thrive and harborage to nest.

To reduce rat populations, try the following sanitation measures:

Store any bulk food items in large metal containers with tight fitting lids, rather than bags or boxes that can easily be gnawed through.

Keep dog food or other pet food stored in a Rubbermaid container overnight.

Remove clutter such as paper and cardboard that rats might use to build their nests

Remove grass clippings and yard debris near structure

Trim up shrubs and bushes so they do not touch your home and so you can see beneath them

Store firewood away from structure

Pick up fruit and nuts that fall from trees

After you have followed the sanitation measures outlined above you can start the rat removal process. There are several methods available for both indoor and outdoor rat control and you should choose the method(s) that best fits your needs and preferences.

Glue traps, snap traps and live catch traps

Products needed : selected trap, bait for trap

Trapping is the preferred method of indoor control. There are several advantages to using traps for rat removal indoors. Trapping does not require the use of rat poisons indoors. Trapping does allow you to know if a rat has been trapped so that you can can be sure your efforts are working. And last, trapping allows you to remove the carcass to avoid bad odors and secondary insect infestations from decaying carcasses.


A Step-by-Step Guide for Getting Rid of Mice

You may think getting rid of mice isn’t a huge priority. How much harm could they truly cause? Unfortunately, the answer is a lot. Mice may appear to be all cute and cuddly… but don’t be fooled! They can cause some serious destruction to your home and health. This is why hiring a professional pest control company will benefit you greatly.

ARE MICE REALLY A THREAT? I’M NOT CONVINCED.

The short answer is absolutely. Mice are known as nibblers, meaning they’ll put anything and everything in their mouth, even electrical wires. In fact, experts have found that nearly a quarter of house fires can be traced back to damage caused by a rodent. Although they’re small, their teeth are mighty and can puncture wood, plastic, vinyl, aluminum and even concrete if not cured properly.

Not only are they destructive, but they’re also a threat to your health. It’s estimated that rodents invade nearly 21 million homes in the U.S. every winter, and we’re not talking gifted pet mice during the holidays. A wild mouse infestation can cause way more than just a headache for families. Exposure to their droppings, urine, and saliva can cause serious illnesses such as hantavirus, bubonic plague, and salmonellosis. Their destruction combined with being carriers of the infectious disease makes these little critters a major cause for concern.

EASY STEPS FOR GETTING RID OF MICE

There are a lot of homeowners out there who like to take matters into their own hands. You’re not required to use a professional rodent exterminator, but if you decide not to we want to make sure that you have the information you need. We’ve outlined 5 easy steps for getting rid of mice and making sure they stay gone.

Find and Eliminate All Entry Points

The first step in getting rid of mice is figuring out where they initially came from. They most likely squeezed under cracks in doors, holes in insulation, unsealed basement windows, pipes, or any other dime-sized opening. These obnoxious little critters are equal parts crafty and determined. If there’s a will there’s a way and they certainly have a will.


How to Get Rid of Rodents

When you have unwanted visitors in your home such as rats or mice, there are some steps you can take before calling in professional rodent control. The first thing to do is to read our guide to getting rid of rodents.

Choose a Method

There are many kinds of rodent control available and they fall roughly into the following three groups: snap traps, which use spring-loaded bars to kill mice or rats; cage traps that tunnel the rodent in and then capture it; and poison bait, which will kill the rodent after it eats it. Snap traps are commonly used to kill mice and rats within homes. For best results these traps should be set flush to walls, with the trigger plates facing the wall.

Rodents generally travel with their bodies against the wall for protection. Cage traps capture live prey and are used when the homeowner does not want to harm the rodent. To avoid re-infestation, mice may be freed 500 metres from the house, but rats must be released at least 3,000 metres away so they do not find their way home.

Poison traps, pellets and bait should not be used within the house because the rodent may eat the poison and then die in wall cavities or under floor boards, creating unpleasant odours. The control devices picture

Set the Trap

If you have selected a snap or cage trap, you will need to set it up correctly for best results. Mice are quite curious and will approach a new trap and easily get caught. Rats however are more cautious and will not approach anything new. Consequently, rat traps should be left without any bait for at least a couple of days until the rats are fully familiar with the trap. Then the trap is baited and the rat will be caught


Mouse and rat behaviour

The deer mouse (Peromyscus maniculatus), the house mouse (Mus musculus) and the brown rat (Rattus norvegicus) have long lived in proximity to humans. But that’s no reason to tolerate their presence if they get too close to us!

Rats and mice both belong to the family Muridae, and have spread from Central Asia to nearly every part of the world. They were likely introduced (involuntarily) to North America by European colonists. The house mouse is small, reaching no more than 30 g in weight

It is recognizable by its large ears, long tail, brown back and grey belly. The deer mouse, which is more common in rural areas, has brown-white fur with a white underside and feet, and its tail is as long as its body. The brown rat, also known as the sewer rat or Norway rat, has a stocky body and can weigh up to 450 g (1 lb).

In the fall, mice and rats seeking warmth and food are attracted to barns and other farm buildings, warehouses, landfills, houses, etc. These rodents will then be active in those locations all winter long, since they do not hibernate.

Are mice and rats useful or bothersome?

Some rats (specially bred strains of brown rats) and mice (albino house mice) are used in laboratories for scientific research.

Both rats and mice are popular as pets, alongside gerbils, chinchillas and other small rodents.

In the wild, both types of rodent are prey for several species of mammals and raptors.

Continue Reading
1 2 3 6